The decision to enter the Foundations revealed competition was a big one. Although I am an experienced dressmaker I am still new to corsetry. Here was an opportunity to test myself but could I really cut it against the talented makers who’s work I admired last year?
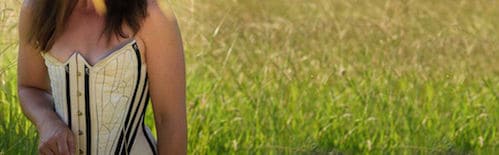
As is my usual approach to any project I had miltiple ideas swimming around at once. The strongest developed from a photo of an edwardian lady who was very helpfully posed in front of a mirror. I could see all of her corset in the one image. I was struck by the fact I could see the wings of insects already there in the panels. Being new to corsetry I am still exploring the possibilities of the materials, especially the spiral steel boning. I was surprised how flexible it was when I first started to use it. I wondered if I could bend it around lateral curves as part of my design.
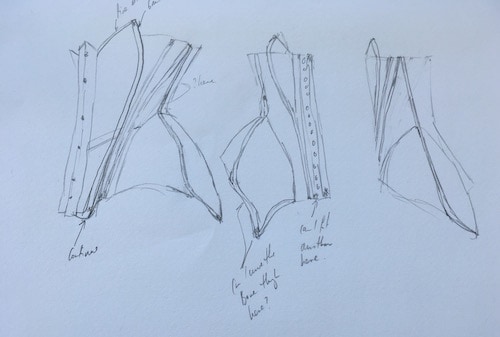
The photo below shows one of my latest sketches before I started the pattern.
The pattern began its life as a mould in cling film and masking tape wrapped around my sister. This gave me an exact shape of her body and allowed me to cut the panels where I wanted to. I had in the past made a basic underbust from this pattern so I knew it worked and could be adapted for the wings corset.
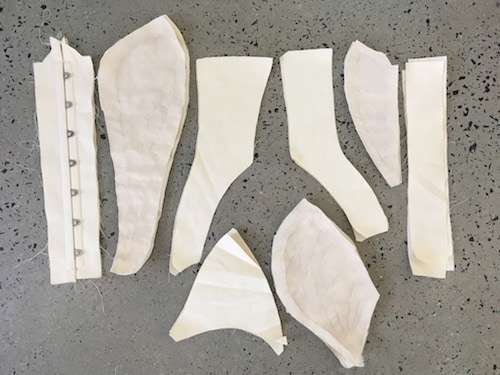
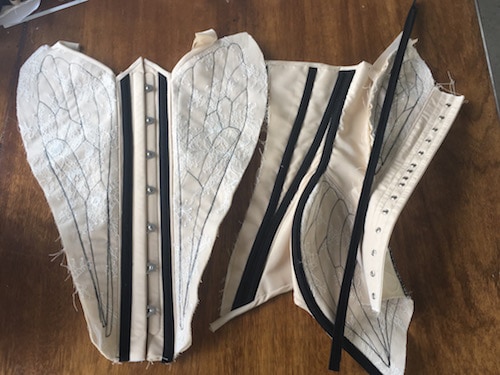
The first toile I started made it clear that this idea was going to be more difficult than I had expected. I needed to work out construction methods as I went and the order they needed to be done in was not the usual order for corset construction. The second toile was easier and i used it to finalise boning placement, and the third I finally sorted out the more difficult boning channel construction. A close to final pattern is show below.
My original plan had sheer panels for the 6 pieces which would be wings and I stalled late in the process because of these. Getting the vein embroidery right and making sure the material could handle the stress were questions I didnt want to find the answer to when lacing the finished corset up.
When I joined Foundations revealed I found not only resources for the kinds of complex corsetry not seen anywhere else but an amazing sense of community and encouragement. It reminded me that my idea was good and that finishing it is important even if it isn’t perfect. I left the sheer fabric behind and instead focused on the construction and was freed from the worry that had stopped my work.
The corset is made of a strength layer of dense herringbone canvas and an outer layer of a pink/beige fabric Ihave no idea the composition of. The wing panels have a layer of cream Chantilly lace to give them some lightness . The boning channels are made from black coutil.
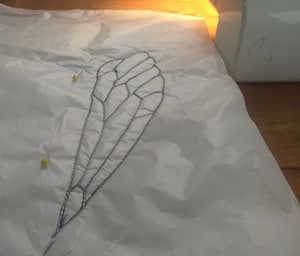
I stuck with the line drawings of the wings as I had planned them for the sheer panels and applied them to the solid fabric. I drew them on kitchen paper and using a continuous line sewed the pattern on the machine in black thread. Embarrassingly I have to admit that one of the jobs I most enjoyed was tweezing the tiny shreds of paper out from between the stitches, it was so satisfying.
The corset still has been hard work but it has been invigorating and inspiring. The steps to put the corset together have been deceptively complicated. Usually bones are added late and edgings are done last but for this design I needed to complete whole sections including boning before I could join it to other sections.
The curved boning channels were cut on the bias and they were hand tacked down both edges before very careful and slow sewing. Below is the corset in construction.
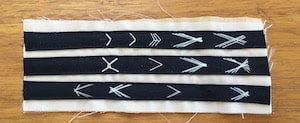
I had always assumed I would floss the corset but when it came time to I wasnt sure how to apporach it. In the end Imade a sample. My concern that the flossing might clutter up an already conplex design waw unfounded. I decided on a small double cross in contrast cotton. I like to use a fine crochet thread for flossing, they are impossible to break.
When all the sewing was completed I arranged a fitting and there were some alterations that were needed. I knew the hip curve might be an issue but I had hoped to be able to pad my model instead of unpicking my corset. Unfortunately it had to be done and I reminded myself that knowing when to undo your work is perhaps one of the most important skills a creative person learns. (amazing article on how the Edwardians created their shape with padding so it is totally a legit cheat!)
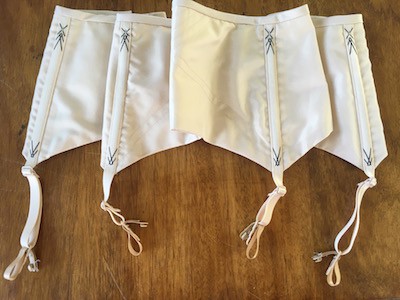
To add some more detail I made a pair of matching suspenders and added a pair of clips to the corset front. Sadly stockings proved difficult to source ( unless Iwanted black or ghastly red ). Although the lace tops look lovely they slightly offend my sense of functionality as the stay ups technically render the clips pointless.
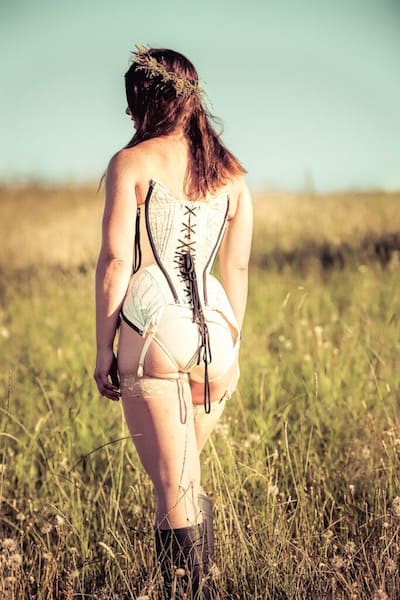
Something this special I decided was worth the investment of a professional photographer. I used a local photographer SK Photography The location is actually where I live in regional NSW. My husband was very happy when I asked him to stop mowing for a little while. Flies are a constand plauge here and I am a little bit sorry I didnt choose the fly as my insect inspiration, my model would have been covered in them. The whole photo shoot went beautifully and I am pleased to have hired a professional for the job. The photos look amazing. I partictularly like the way the gumboots finish off the look ( summer in Australia = snakes)
By the end of it all my fingers look like ballerinas toes and I never want to change the thread colour on my sewing machine ever again. That aside, I am thrilled with the result and cant wait to hear the theme for next year.